Introduction to snowshoeing
In collaboration with Protégez-Vous
Going for a walk or a hike is one of the simplest ways to enjoy winter and acquiring a pair of snowshoes will definitely make getting around a whole lot easier. Size, material, shape of the crampons (spikes), type of binding... find out which features are right for you.
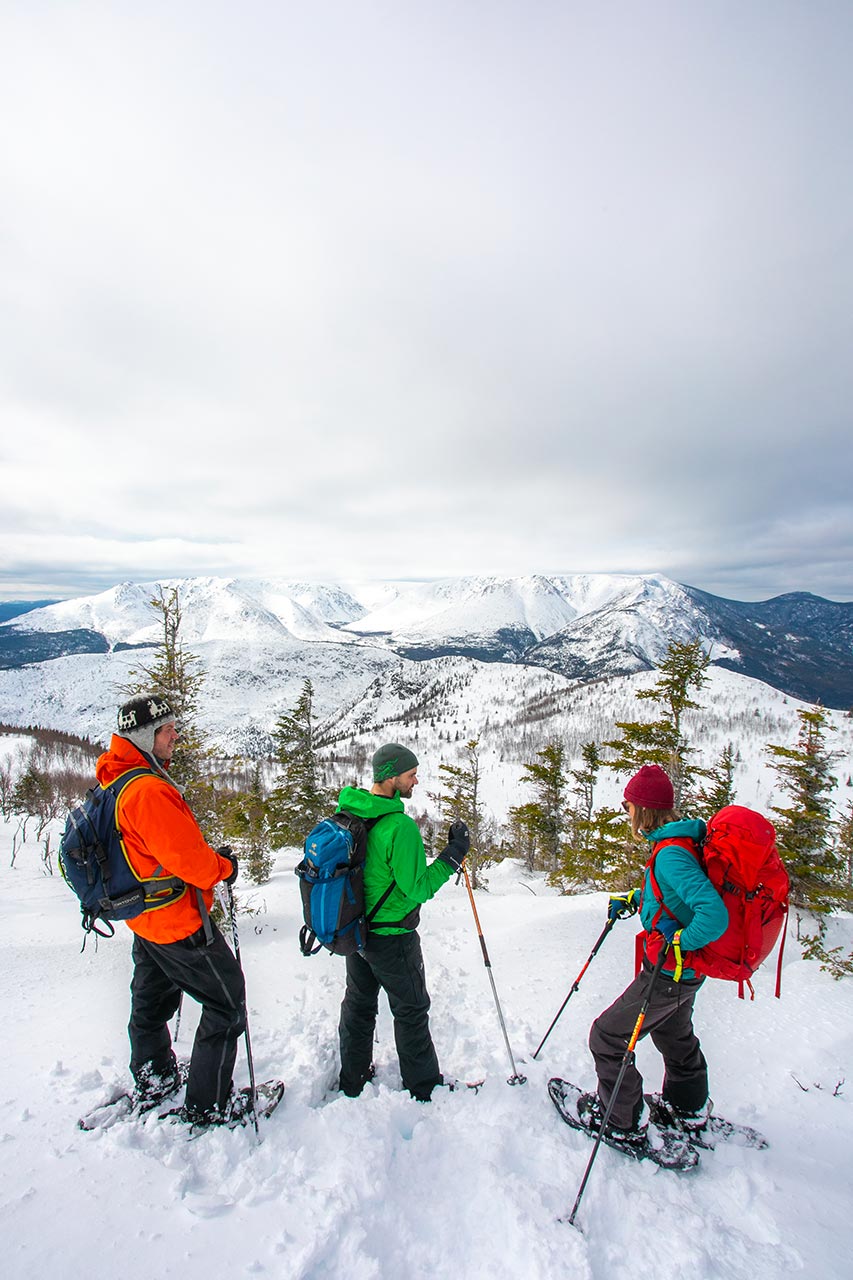
You can obviously lace up your winter boots and head off on a winter hike. Boots do the trick for short outings in snow that’s neither too deep nor too slippery. Using snowshoes, however, will save you a lot of effort. On a slope, you won't feel like you're reeling backwards with every step. And, above all, this equipment will prevent you from getting hurt.
Snowshoes create a large contact surface with the ground, thus distributing your body weight. This means you glide on the snow better than with a simple pair of boots or boots with crampons (spikes). Wearing snowshoes is ideal after a good powder snowfall, but also in deep, packed snow where you could sink. On hard-packed trails, however, the experience is far less enjoyable than on soft snow.
Buy or rent
New adult snowshoes range from $50 to $350 per pair in big box and specialty stores. Of course, not everyone needs $300 snowshoes, but it's best not to pay less than $100, since the quality of the materials, in particular, is proportional to the price. Generally speaking, the more you spend, the more cold and shock resistant your equipment will be, and the longer your snowshoes will last.
In addition, higher-end models often have fit options and features that increase comfort, so you’ll enjoy the activity more and want to do it more often.
If you want to learn how to snowshoe or if you’d just like to head out from time to time, renting equipment in a store or in a rental centre is a good idea. Many places where you can enjoy this activity, such as national parks, offer rentals. This also allows you to try out different models and determine what suits you and what pleases you less.
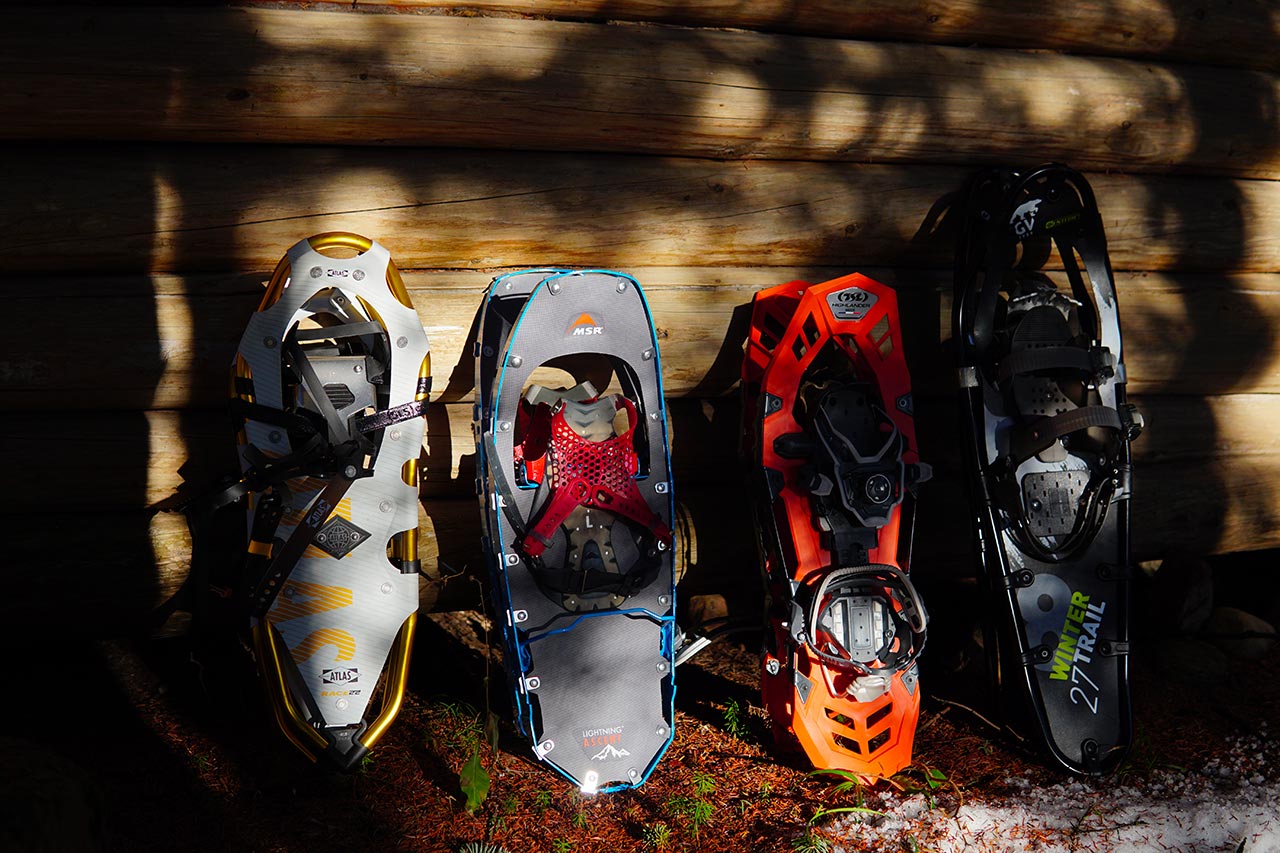
Types of snowshoes
In most sports stores, you’ll find snowshoes of different categories, i.e. for specific practices or terrains.
1. All-purpose models
All-purpose snowshoes are suitable for folks who frequent flat or hilly park terrain with moderate slopes.
2. Ascent models
Featuring crampons with more “bite,” ascent model snowshoes are designed for rougher terrain with steeper slopes. Many models have a heel lift, a movable heel to be added on before tackling a long, steep climb. During these periods of ascent, the heel lift helps propel you by raising your heel, which is not necessary in undulating areas.
3. Running and racing models
Running and racing snowshoes are designed for athletes who like to run on surfaces with compact snow. Lightweight and narrower than a typical model, they allow for dynamic strides. However, they glide a little less well on snow than other models.
When you go to the store, you may come across other models, and even wooden snowshoes inspired by Indigenous traditions. Without crampons, these can be useful for walking on flat ground after a heavy snowfall, but they aren’t designed for ascents or descents.
Materials
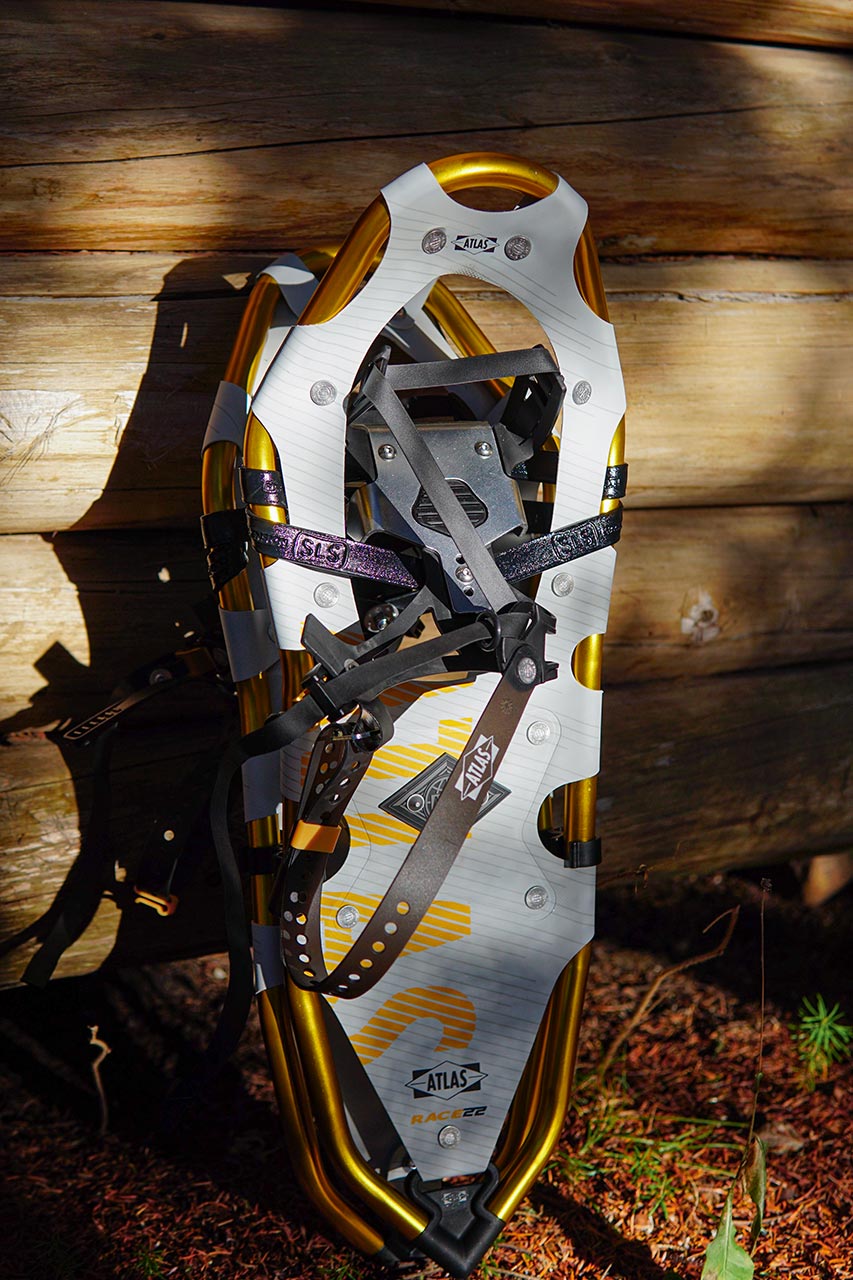
There are tubular and molded plastic snowshoe models.
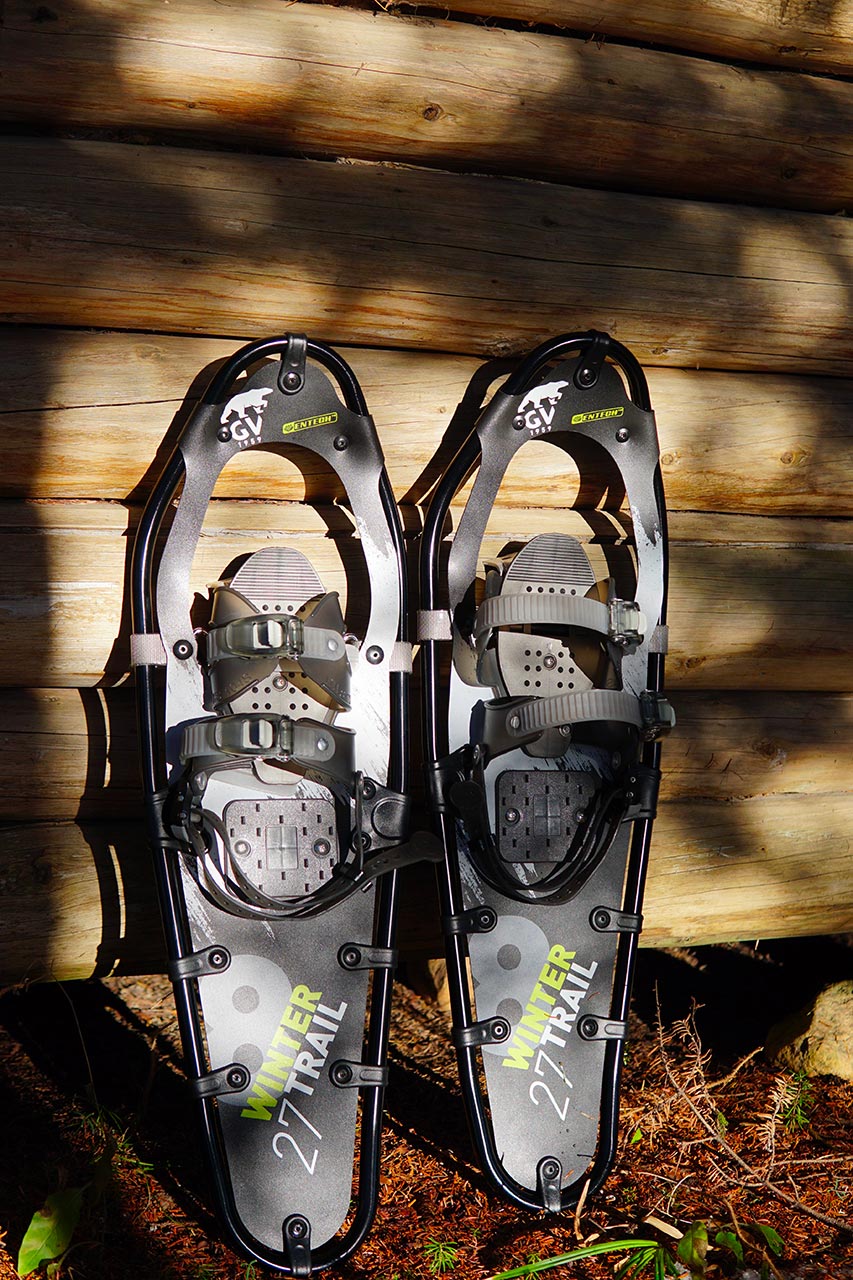
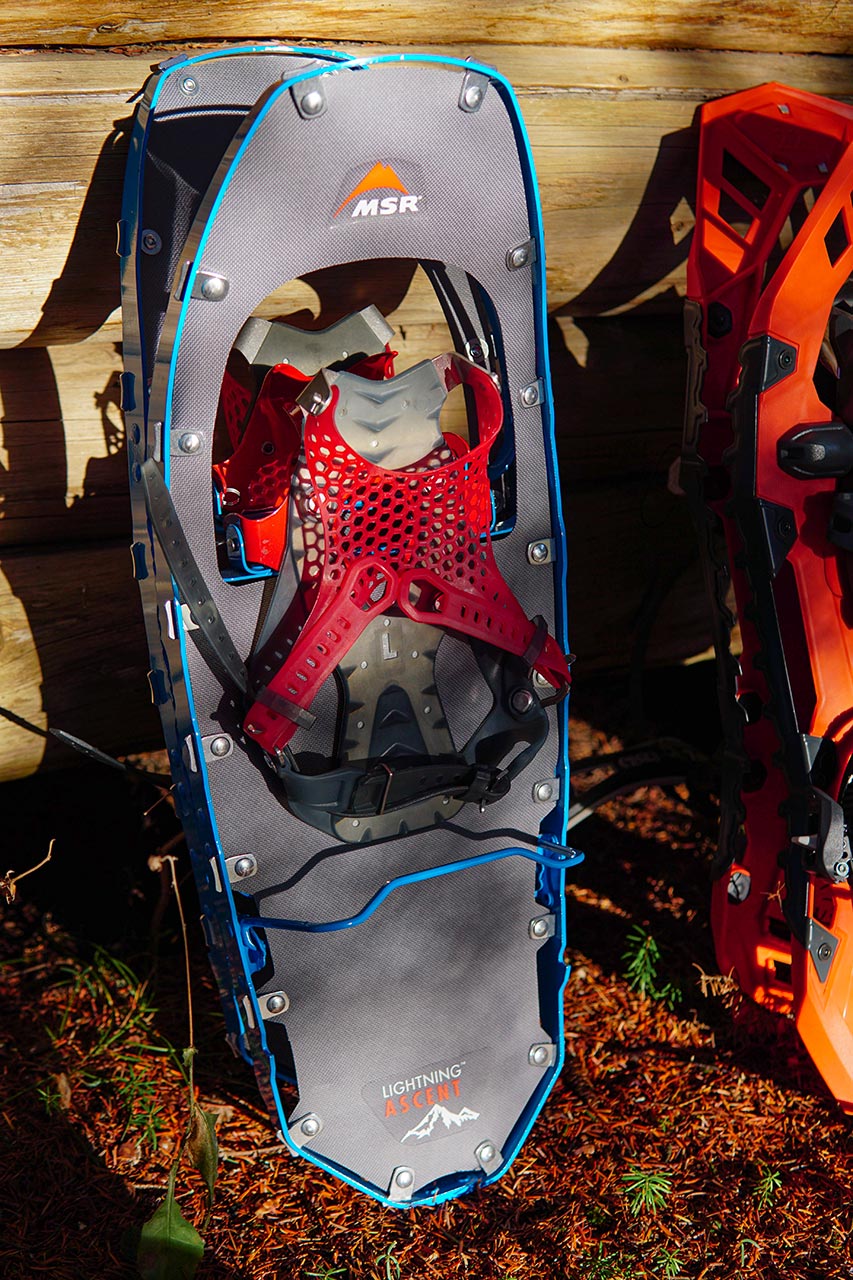
1. Tubulars
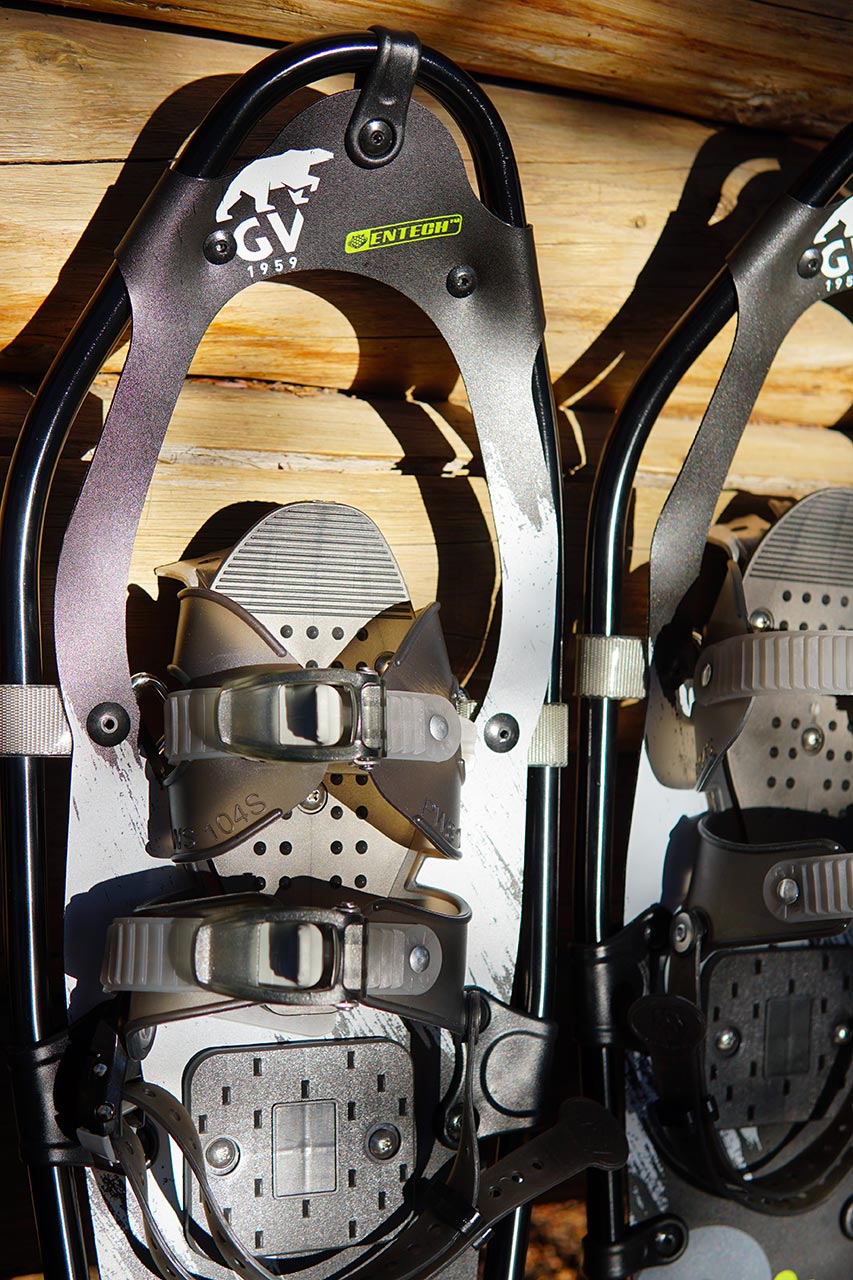
The contour of classic tubular snowshoes is formed by an aluminum tube. It’s from this tube that a fabric (or synthetic skin) is stretched and held in place by rivets. This is the most common snowshoe model on the market. Some higher-end variants have a frame made of light steel or serrated aluminum and a stronger fabric and fastening system.
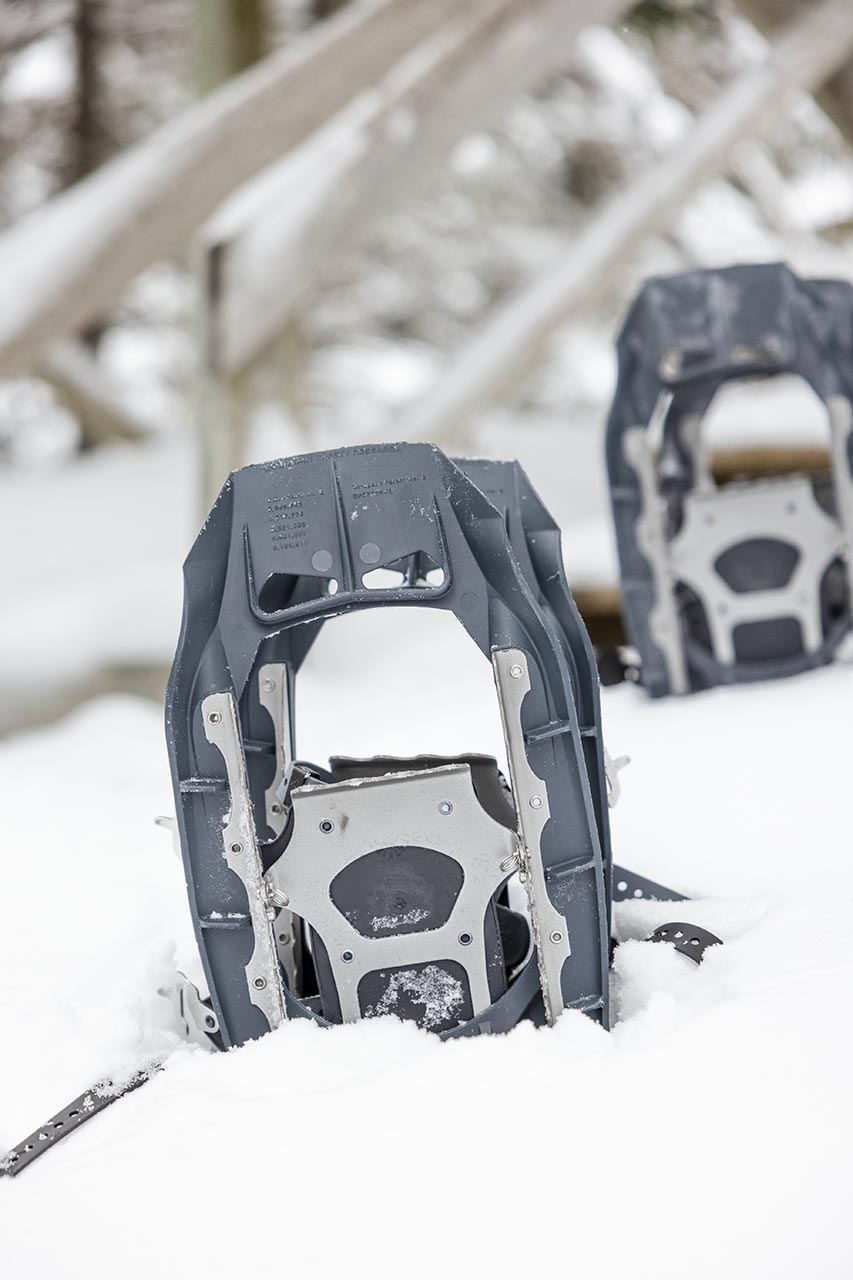
2. Molded plastic
Other common snowshoes are made of molded plastic. They’re often lighter, but also more fragile than tubular models, since there are fewer attachment points and they can eventually snap. One of their advantages, however, is that molded plastic can bend slightly. On uneven terrain, this flexibility makes the stride more comfortable and spares your joints!
Also note that molded plastic snowshoes are generally noisier than tubulars, especially on a tamped-down surface, a commotion that can become annoying.
Size
1. According to weight
To glide on the snow most effectively, you must acquire snowshoes whose size corresponds to the weight you have to support: your weight and the weight of the equipment being carried.
Most models range from 20 to 36 inches in length. To help you determine which size is right for you, the manufacturer usually provides a chart associating the total weight with the required snowshoe length.
If you don't have access to a chart, you can refer to this general guide to buying all-purpose or climbing snowshoes, published by various outdoor equipment stores.
| Weight to support* / Snowshoe length | 20 to 23 in (50.8 to 58.4 cm) |
24 to 27 in (61 to 68.6 cm) |
30 in (76.2 cm) |
36 in (91.4 cm) |
|---|---|---|---|---|
| 80 lb (36.3 kg) | Good | Adequate | ||
| 100 lb (45.4 kg) | Good | Adequate | ||
| 120 lb (54.4 kg) | Good | Good | Adequate | |
| 140 lb (63.5 kg) | Good | Good | Adequate | |
| 160 lb (72.6 kg) | Adequate | Good | Good | |
| 180 lb (81.6 kg) | Adequate | Good | Good | |
| 200 lb (90.7 kg) | Adequate | Good | Adequate | |
| 220 lb (99.8 kg) | Adequate | Good | Good | |
| 240 lb (108.9 kg) | Good | Good | ||
| 260 lb (117.9 kg) | Adequate | Good | ||
| 280 lb (127 kg) | Good | |||
| 300 lb (136.1 kg) | Good |
*Corresponds to the weight of the individual and the equipment he/she carries.
2. Depending on the type of snow
In addition to the weight of the snowshoes, you should also consider the type of snow you’ll be walking on. If you’re going to cross virgin fields after a heavy powder snowfall, a snowshoe with a large surface area will allow you to glide better on the snow.
On the other hand, if you only plan to explore heavily traveled trails where the snow is often compressed, such as in national parks, too much surface area will be unnecessary and even cumbersome. You may even want to choose a smaller size than the manufacturer's guide indicates.
Want to do a little bit of everything? Unfortunately, there’s no such thing as the perfect pair of snowshoes for all types of outings and snow conditions. You'll have to make compromises. Ask yourself what activity you’ll do most often and what will be the exceptions. Snowshoes that correspond to your most frequent use will be more practical and will probably do the trick in exceptional circumstances as well.
And if you feel that you need larger snowshoes for a particular expedition, renting equipment or buying extensions to increase the surface area of your snowshoes are two possible solutions.
Sticking to it
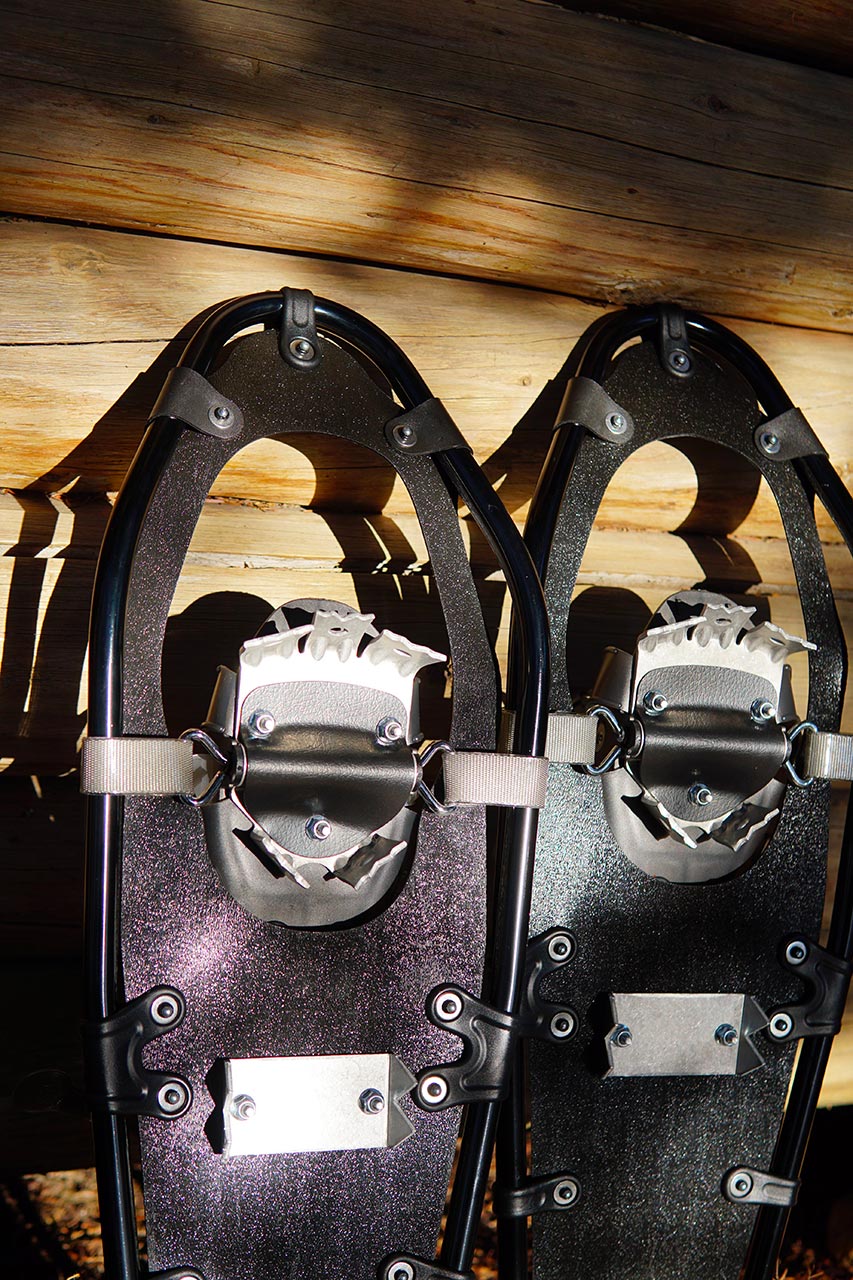
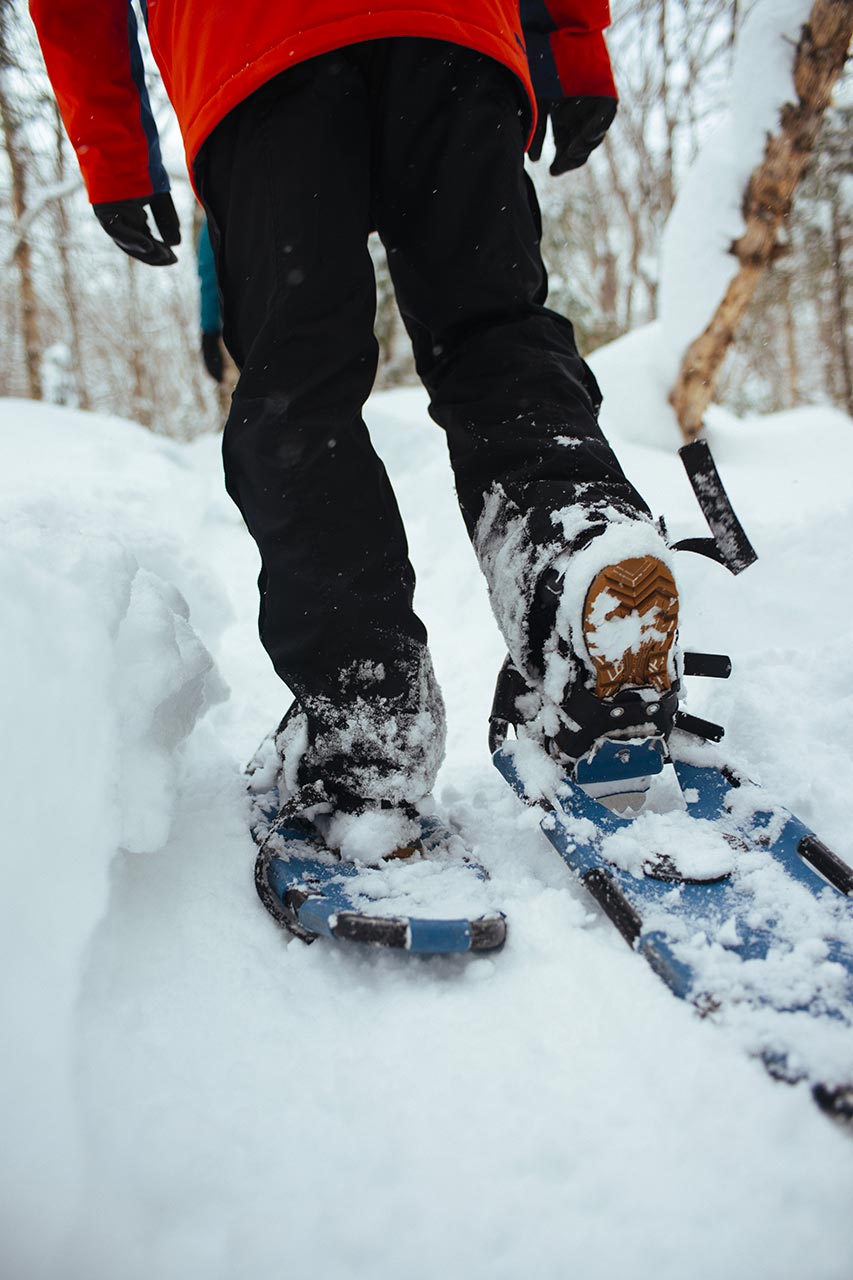
On flat or hilly terrain, snowshoe crampons are useful, but they don't need to be too “spiky.” On steeper climbs or descents, it's a whole different story! You'll want them to have a good bite on the ground so you can climb without too much effort and safely glide downhill. Beyond the size and number of spikes, check out how and where they’re placed.
1. Avoid hand or pentagon shaped crampons
Entry level snowshoes often have a large hand or pentagon shaped crampon. This style of crampon gathers the snow but doesn’t grip it. If the snow is sticky, it can build up and form an unpleasant ball under your foot. The heat from your foot can also melt the snow under the snowshoe. The snow can then freeze. Then it’s tough to remove this icy mass!
2. Rail crampons are the way to go
A row of spikes at the front of the foot, perpendicular to the length of the snowshoe, is a must for getting a good grip when “mounting”. As for the spikes on the back and sides, they’ll vary from one model to another. Placed this way, crampons have very little risk of snow accumulation. They also offer stability at the front, back, and sides, since they often run the entire length of the snowshoe.
Binding arbitration
1. Ease of use
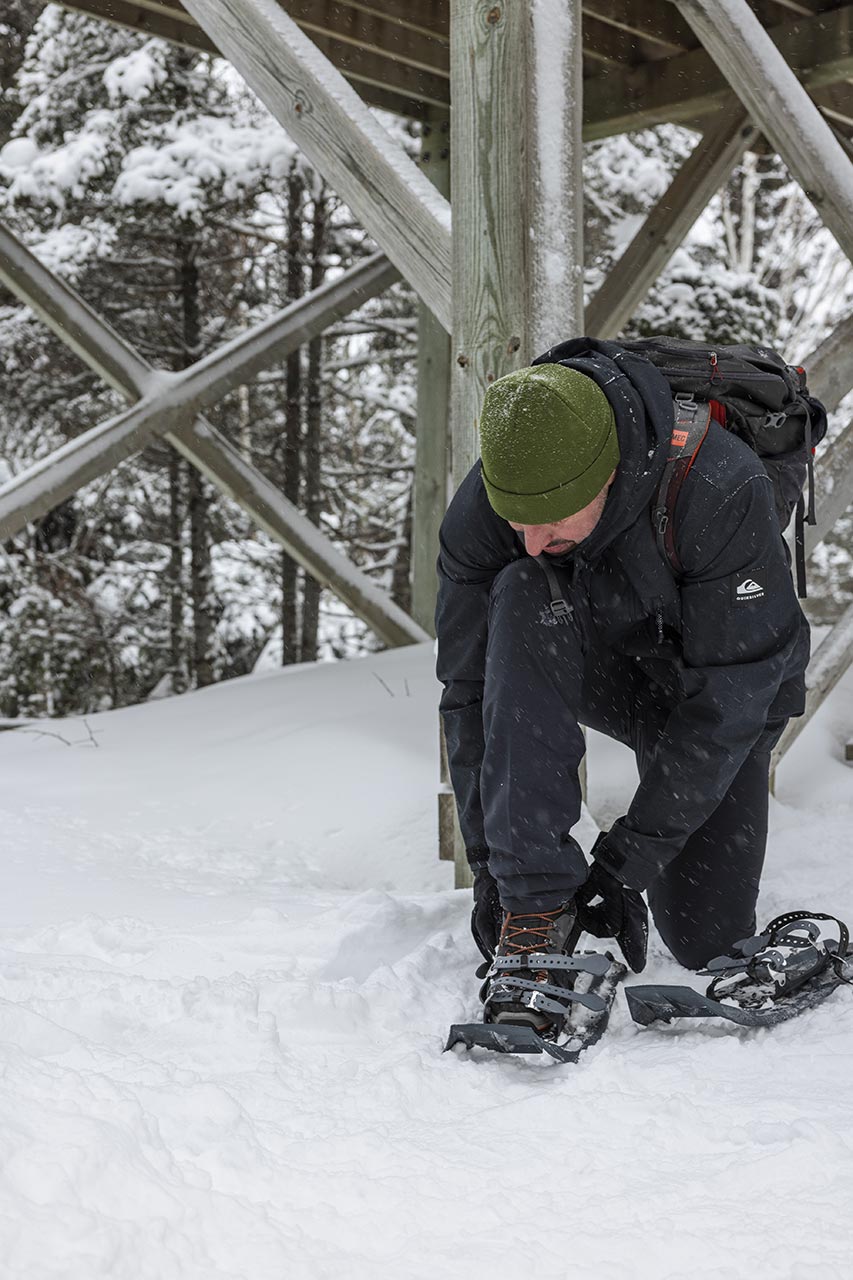
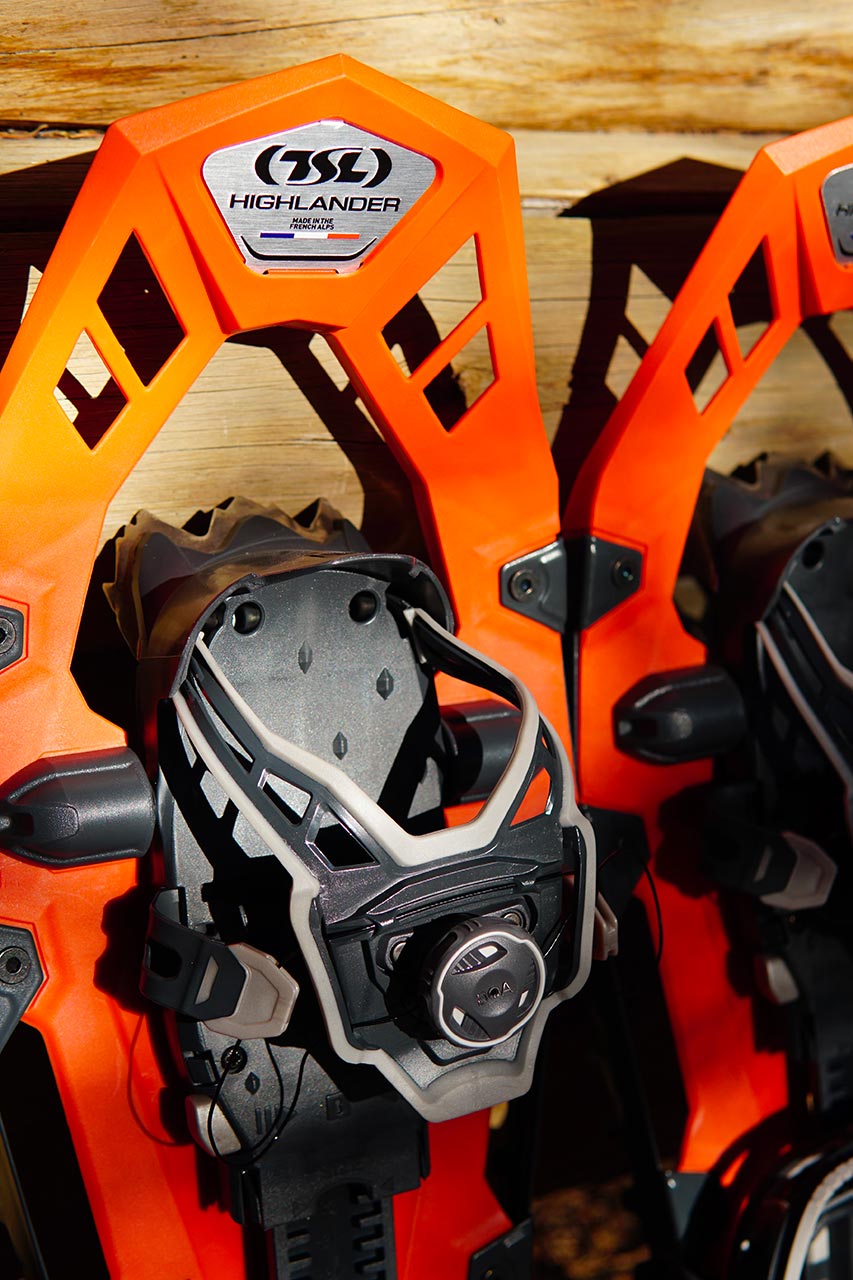
The type of binding is an important element for the comfort and ease of use of the snowshoes you choose. Adjusting many straps to the sides or back in a bent or crouched position still requires some agility and effort. If dexterity isn’t your strong suit, opt for a simple binding system.
There are a variety of such systems, some more sophisticated and effective than others. Of course, such products will cost you more. However, if the expense makes the activity more enjoyable, it may be well worth the price.
When you go to the store, bring the boots that you’ll be wearing while snowshoeing. The staff will be able to suggest different types of bindings so you can pick out the most comfortable set for you. Basic, easy-to-use straps may just what you need. You might also prefer a BOA lace system, which allows for a quick and precise fit with a thumbwheel adjustment.
2. Materials
Entry-level snowshoes often have fabric straps, for example made of nylon. The problem? If you go on a three- or four-hour outing, your feet will generate heat, which can continuously melt snow on your boots. This moisture will be absorbed into the fabric of the straps, which could then freeze and become more difficult to adjust and remove.
If you plan to be out for several hours, opt for plastic straps. This binding system is easy to repair in the middle of an adventure outing. If the plastic strap held in a hook breaks, for example, you can replace it with a simple rope and continue using your snowshoes.
3. Pivot pointers
Most in-store products are designed to allow the snowshoe to remain unattached under the heel, which is an articulated pivot point. When you take a step, your heel lifts while the snowshoe remains parallel to the ground.
A model where the foot remains fixed on the body of the snowshoe follows your steps with precision. However, you risk getting snow on your calves, and even on your back, throughout your excursion. Over the years, the system has been improved to limit this inconvenience, but you'll still be catapulting snow on yourself if you choose this type of binding.
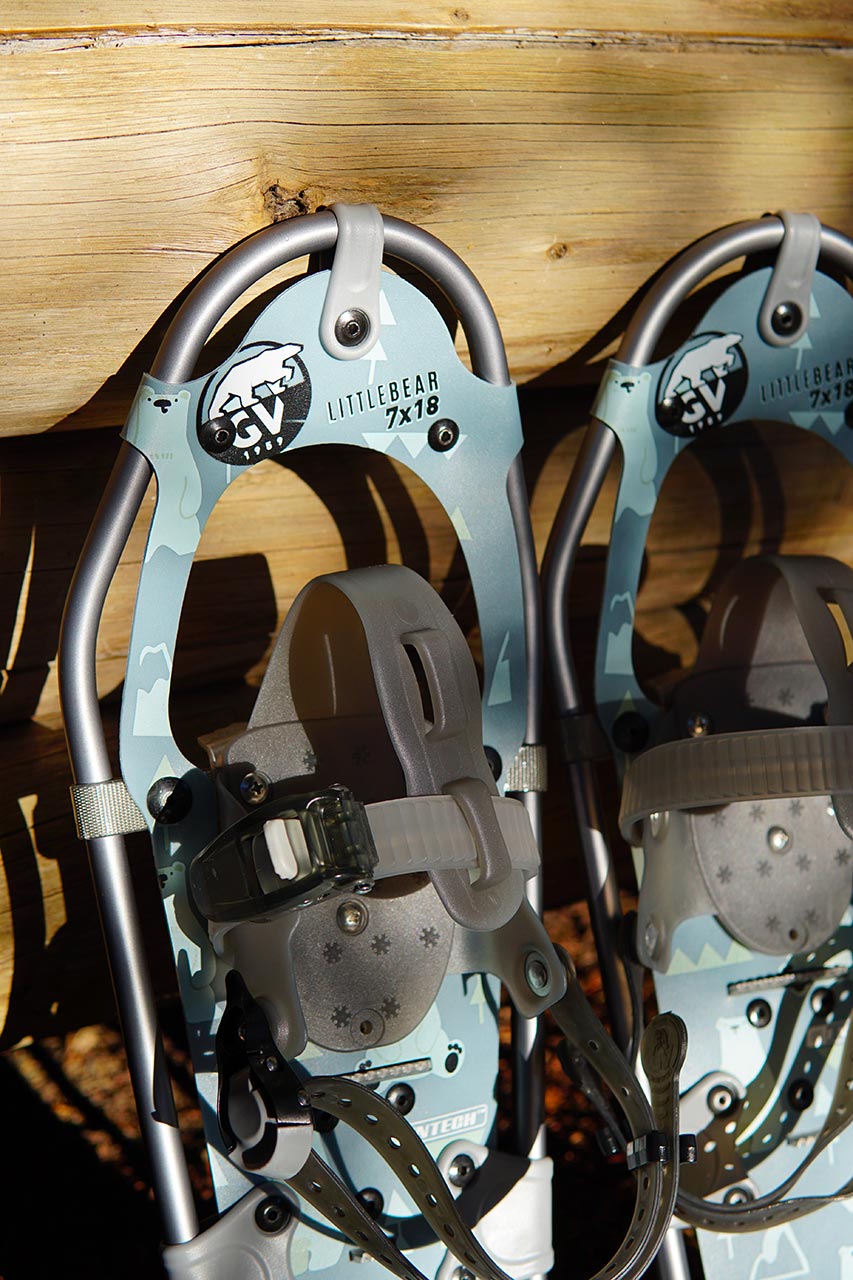
Snowshoes for small fry
Want to introduce your kids to snowshoeing this winter? The important features for children's models are the same as those for adult snowshoes. However, before spending $50 to $150 on a new pair of snowshoes, renting them may be a better idea. Keep in mind that your child will grow up and the snowshoes you bought this winter may not fit next year.

Upkeep
Before the season begins, and even before each outing, take the time to inspect your equipment. Make sure everything is in proper working order and that your binding system is still secure.
To avoid unpleasant surprises during an outing, prepare a kit containing spare parts or materials (screws, nuts, etc.) to replace or repair anything that might break.
Finally, after each use, dry the spikes of your snowshoes thoroughly, because the metal teeth tend to rust easily.
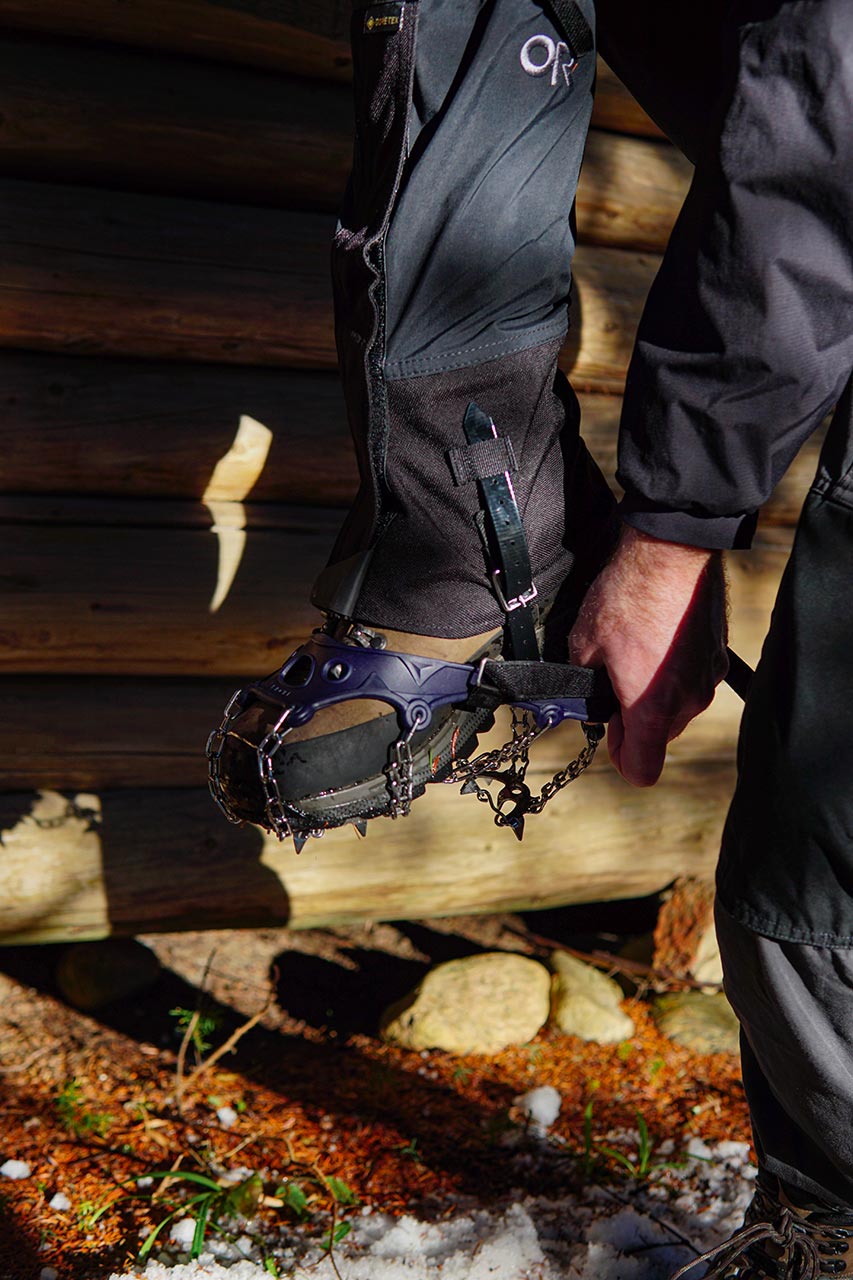
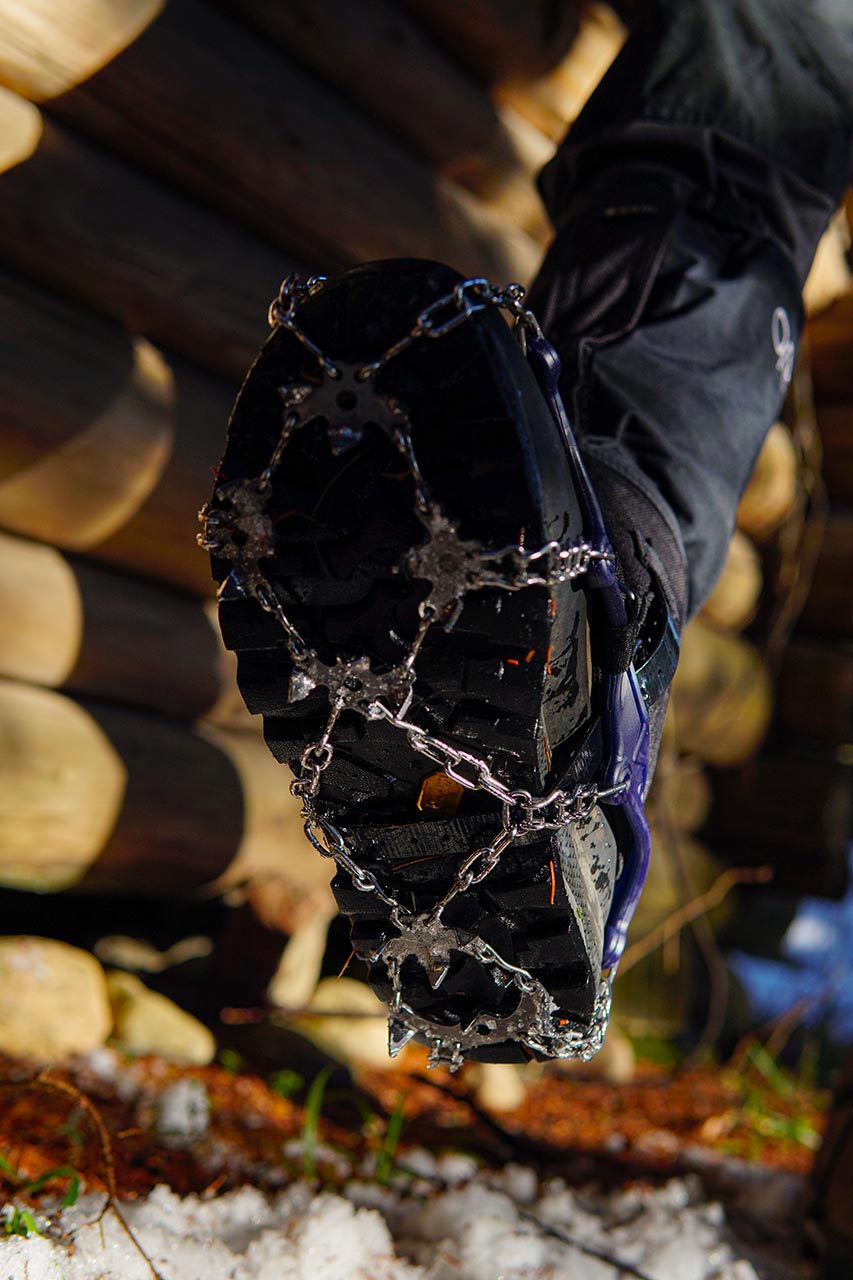
Snowshoes or crampons?
Many outdoor specialists suggest bringing a separate pair of crampons on a snowshoeing excursion. The advantage: in addition to being small footwear and therefore easy to carry, they’re useful if you encounter patches of ice along the way, especially at the beginning and end of the season. On popular trails, where the snow is being pounded by others, these crampons are often the best choice. They’re also less cumbersome than snowshoes when walking on narrow paths.
Choose crampons designed for hiking, featuring large spikes with a solid grip. Crampons made for the city, with small, rounded tips, will not give you enough grip on most icy or snowy terrain. Hiking crampons cost between $50 and $90.
Walking sticks
1. Advantages
While not obligatory, walking sticks offer several advantages, especially on long hikes.
- They spread the load.
Walking sticks help distribute the load (the weight of your body and what you carry on your back) on your lower and upper body. This reduces the pressure on your ankles, knees, and hips. In addition, the muscular effort is not concentrated only in your legs, which can help your endurance during a long hike. - They offer better stability.
Walking sticks also contribute to better balance, as you double your support. Improved stability helps you avoid falls, among other unpleasantness. Sticks are especially useful in rough terrain, especially when you're going downhill with a pack on your back. - They keep your hands from going numb.
If your hands get bothersome pins and needles on your winter hikes, walking sticks could be the solution to your problem. They keep your hands up and moving, preventing them from going numb. - They allow you to maintain your pace.
Walking with sticks helps to energize and even out your pace, which can otherwise vary depending on how tired you feel. You can attach your walking sticks to your pack or bag and use them only when you feel the fatigue coming on.
2. Adjusting your set
Adjust your walking sticks so that your elbows are positioned at about 90 degrees to the handles. This position is important: holding your sticks too high or too low can cause discomfort and pain.
Handle straps should be adjusted to allow your hands to be supported and to avoid overworking your wrists.
3. Technique
When walking, plant your sticks slightly outside your body. You can choose to move your arm and leg forward on the same side (for example, the right stick and the right leg) or, conversely, move your leg and arm forward on the opposite side. You can also plant both sticks at once in a steady rhythm, a technique that is particularly useful on steep climbs.
4. Climbing up
When climbing, planting your sticks behind you allows you to support your legs as you push and to propel yourself upwards. Planting them in front of you makes it possible to pull yourself upwards by using them as support.
If the climb is steep over a long distance and you choose to plant your sticks in front of you, It’s wise to shorten them by a few centimeters.
5. Heading down
As you make your way down, plant your sticks in front of you to help maintain your balance and cushion the impact on your joints. To be more comfortable and for greater support, you can even extend your sticks, especially if the slope is steep.
On a more difficult descent, It’s best to loosen the straps a bit, or not use them at all. If your stick gets stuck and your hand gets caught in the strap, you could get hurt.
Apparel
To make your snowshoeing excursion enjoyable, It’s important to dress appropriately. The insulating properties of materials as well as their ability to let air through and wick away moisture play a huge role.
1. Type of coat
- Down models
Down coats are very warm and suitable if your walks are not too demanding or if you tend to get cold easily. If you sweat in a down coat, however, the moisture inside may become a problem. Carrying a down vest or quilted coat in your bag can be a practical solution. Just wear it during your breaks for a quick hit of heat. - Synthetic fiber models
These coats are slightly less warm than down coats, but they dry faster and are more breathable. Their insulation is made from polyester or polypropylene fibers, which retain heat and keep their thermal properties even in wet conditions. - Shells
Categorized as a soft shell or a hard shell, this type of coat often lacks insulation. Thus, it must be combined with other clothing, according to the principle of multi-layering. Highly breathable, the soft shell is made of a soft and supple or thin and slightly "laminated" fabric. It can be water and wind repellent, but it doesn’t offer wind resistance or true waterproofing in steady rain. The hard shell is protected by a waterproof coating or a waterproof-breathable membrane such as the renowned GORE-TEX fabric. In addition to effectively cutting the wind, this coat is suitable for rain and cold conditions.
2. The multi-layer technique
This approach consists of combining several layers of clothing by taking advantage of the properties of the different materials they’re made of.
- The base layer
Its primary function is to draw moisture away from your skin and wick it away. Choose a comfortable, rather tight-fitting garment, such as a jumpsuit or one-piece long underwear. Wool, especially merino wool, is recommended, as are synthetic fibers such as polyester. Forget cotton, which retains moisture. - The middle layer
This is the layer that keeps you warm, much like the insulation in a coat. You could opt for a fleece jacket or a down or synthetic fiber down jacket. - The outer layer
It protects you from the wind and keeps you dry, whether it's snowing or raining. Hard or soft shells, water-repellent insulated coats, and windbreakers do the trick.
That said, in order not to get too hot or too cold, you should adjust your clothing throughout your activity. This will prevent you from sweating and then getting cold from the moisture on your body.
3. Pants and tights
As with your upper body, what you should wear down below depends on the intensity level and weather conditions of your outing.
Soft shell pants are ideal for low to medium intensity outings or cold weather. These models protect your thighs from cold, snow, and wind while you’re on the move. Thinner in the back, they allow heat to escape and they keep moisture away.
If your pace is more intense or the weather is mild, tights are a good option. Slimmer and more fitted to the body, they’ll make moving about much easier.
Also, pants and tights should be water resistant to protect you from snow if you should take a tumble.
4. Toques and gloves (or mittens)
Again, choose accessories that protect your extremities according to the conditions outside.
To avoid sweating too much, getting your hair wet, and then getting cold when you stop, opt for a thin merino or polyester fiber toque.
Bring two pairs of gloves or mittens. Wear the warmer pair to start, and once your body is warmed up, swap it for the lighter one. Choose thin, lined, windproof models.

About Protégez-vous
Protégez-Vous is a non-profit, self-financed, and independent organization that informs, educates, and supports consumers in making informed and responsible choices.